Education In Progress SPAIN wants to share with you some info about ENTOS training contents. It seems to be funny and very attractive. Our physical education teachers and VET students will love it for sure! That seems to be the prediction.
What is going to be uploaded on ENTOS e-platform? What will physical education teachers in Europe do through ENTOS and what’s its advantage?
Education In Progress Spain wants to share this info with you by proposing to you one of its activities you can find on the platform once it will be published.
As we read in the previous articles, thanks to the results collected in the IO1: Competence Framework, the partnership could start creating the method focusing on the development of 5 specific competencies:
- Module 1: Learning through experience
- Module 2: Coping with uncertainty, ambiguity, and risk
- Module 3: Creativity
- Module 4: Taking the initiative
- Module 5: Self-awareness & Self-efficacy
Education In Progress SPAIN is in charge of developing Module 1: Learning through experience. But how can sport be connected with entrepreneurship?
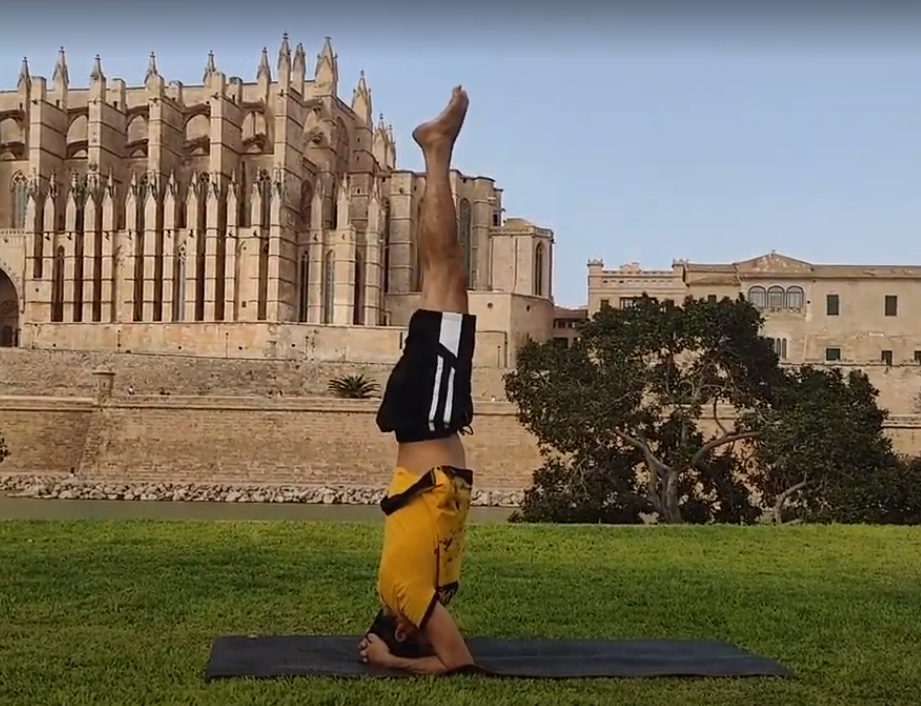
We want to publish one of the activities developed in Module 1., the “Headstand Yoga Position”.
Karin Callipo
EU Project Managers at Education In Progress SPAIN
2.3 Activity 3: Headstand Yoga Position |
| Type of activity |
| Physical exercise |
| Purpose/goal |
| Learn the foundation of the headstand pose, useful to relieve anxiety, remove stress energy, and increase focus. This exercise is focused on developing Self-confidence and Self-esteem. |
| Group size/individual |
| In pairs |
| Material(s) needed |
| Yoga mat |
| Estimated duration |
| 20-30 minutes |
| Instructions |
|
Phase 1: Show your students this video about self-esteem before the start of the lesson: this is an introduction to what self-esteem is and what its importance is, and it introduces the activity of the headstand as an exercise that helps the students develop it. |
|
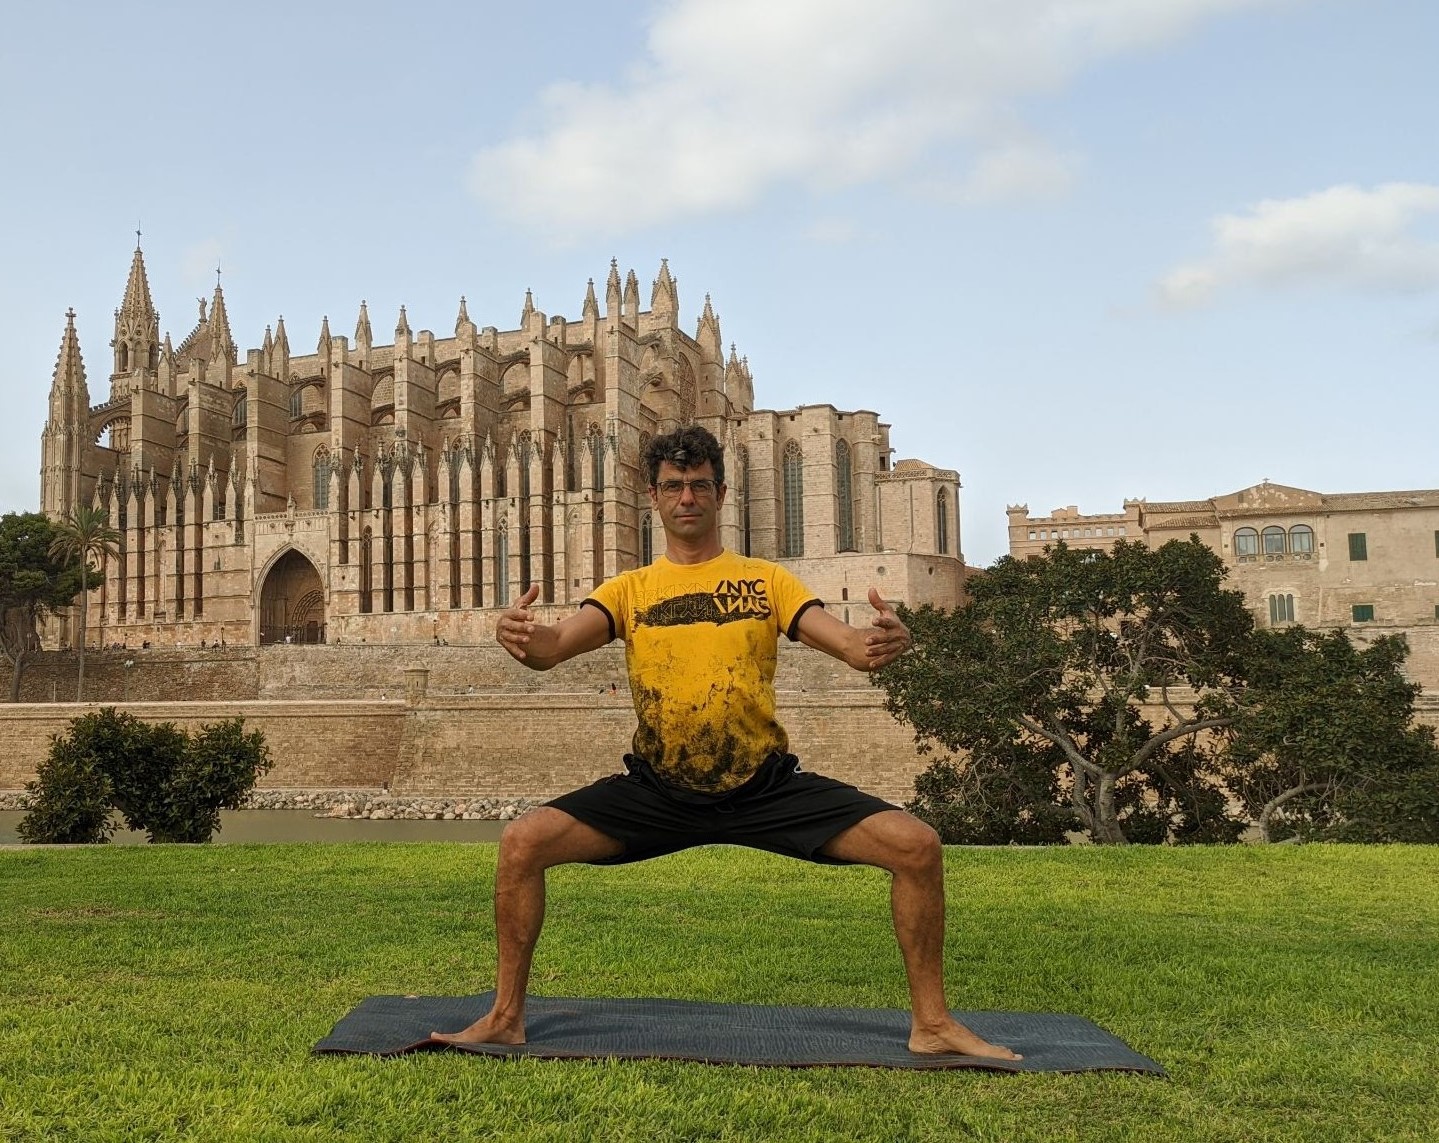
Phase 2: This exercise has to be done in pairs: one student does the exercise of the headstand, and the other takes care of him/her. This second student is also called “the spotter”. The spotter is a fundamental role in safely executing some yoga positions, as he guarantees the safety of the other person. He is also in charge of observing and guiding the execution of the yoga position, and the bigger the risk of the position is, the bigger his importance is. Every student can be the spotter, but it is recommended to have 2 spotters when the person executing the yoga position is much taller or weighs more. It is important to practice yoga playing also the role of the spotter, because it helps understand the technique and the functioning of yoga, and brings an enhancement of empathy; you can’t ask your spotter to pay attention if you didn’t pay attention when you were the spotter. The position of the spotter is the Goddess Pose: start in a wide standing stance, and turn your toes out and your heels in, with your feet at about a 45-degree angle. Bend your knees in the same direction as your toes, and lower your hips down toward the height of your knees. Reach your arms out at shoulder height and bend your elbows so that your fingertips point skyward. Spread your fingertips wide and activate the muscles across your back. |
|
|
|
The spotter must use this pose, as it ensures safety throughout all the exercises for both himself and the other student. 1: the student doing the headstand observes himself and reflects on his movements to correct and adjust them. To do the headstand, you can show the students this video first, so that they can see all the sequence of movements: |
|
And then you can guide them with these instructions: The headstand is a useful exercise to strengthen the upper body and the spine; in particular, the abdominal strength is much improved, as well as the stability and balance of the person. Realizing this exercise requires previous work on self-knowledge; only by mastering it, the student can know his body enough to execute a headstand. Being able to do this exercise results in an enhancement of self-esteem and self-confidence, considering the difficulty of the activity. |
| Extra tips, options or adaptations, checklists, and so on. |
| It’s important to build enough strength in the shoulders and in the body before actually doing the headstand. Take all the time you need to ensure that your students are ready, with pauses and exercises to stretch the muscles especially if they are beginners, in order not to create unnecessary soreness and strain. Especially if the students are beginners, they can do this exercise with the support of a wall, in addition to the support of the other members of the pair. This will make the exercise safer, and easier for them. |


